Lynn’s Lampies
A regular
spot from team member Lynn Davy, a self-confessed bead addict whose unusual
designs often feature lampwork beads. In this series she shares some of her
secrets and shows you how to use FHFteam’s handmade beads and components in your
own creations!
July 2012
Bricks and Ladders
Buildings are
somewhat on my mind at the moment as we’ll be moving house over the summer…
this month’s tutorial will show you a neat way to combine ladder and brick
stitches into a sturdy foundation on which to build a cuff bracelet.
I struggled
for a long time to find a use for ‘double delica’ beads because they have such
huge holes that ‘normal’ sized cylinder beads just disappear up inside them
when you try to combine the different sizes. But they are brilliant for making
ladder-stitched strips because they work up so quickly!
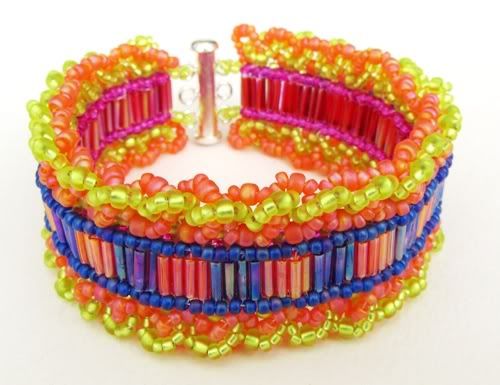
Ladder stitch
is also a good way to use bugle beads, although they are narrower than double
delicas so you need more of them to make a bracelet length. They do give a
lovely texture though…
A ladder more
than two beads wide is a bit prone to gaping between its ‘rungs’. You can widen
it by simply adding fringe (and with holes that size, you can add a LOT of
fringe if you want to!) or by stitching along the edges with brickstitch.
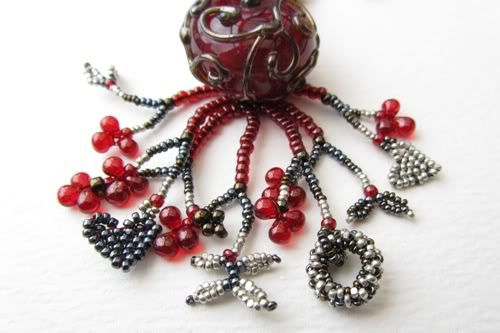
Brickstitch
feels a bit weird to begin with because you don’t actually stitch through any
beads of the previous row, you go under the threads instead; but it’s very
simple really. It’s a versatile way to make lots of different shapes (the
little hearts on this tassel are made with brickstitch)…
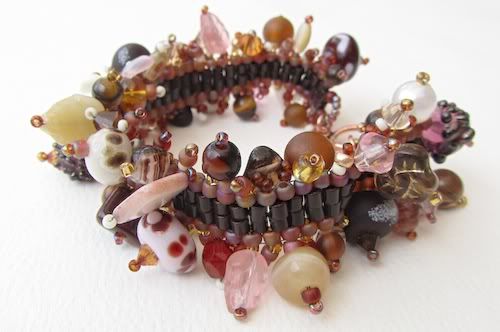
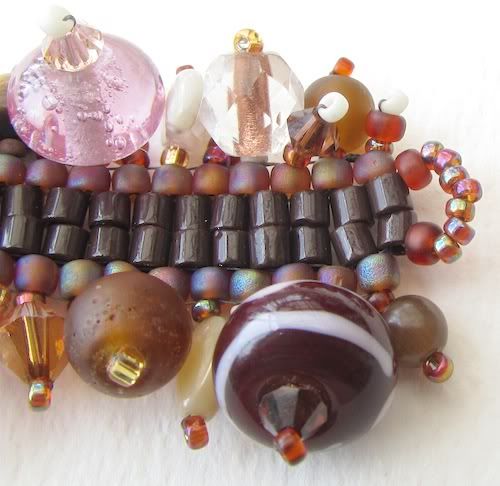
… or to bead
around a larger bead, as in the pendant for this set. (The cuff is made with a
ladder-stitch base and brickstitch edging, too.)
And once
you’ve beaded around a bead, you can add loops and fringes to make flowers…
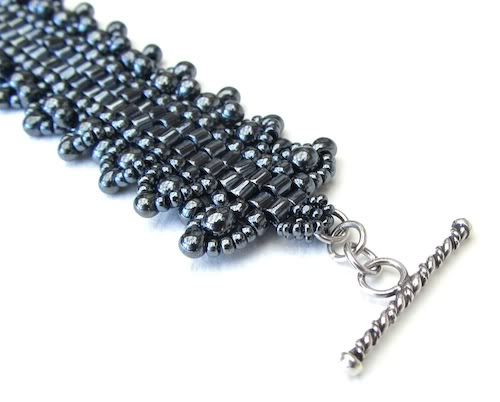
Brickstitch
does have a weakness, though: the thread ‘bridges’ between the beads are
exposed along the edge of the beadwork. Exposed thread is prone to catching and
fraying, especially in a bracelet, which gets a lot of wear and tear, so it needs
protecting. A great excuse to add more beads!
You can add a
simple one-bead ‘picot’ edging (as we did when we made those beaded spacer
beads) between each pair of ‘rungs’. Or you can make a more elaborate, formal
edging.
Or else you
can go mad with lots of beaded fringe. No prizes for guessing which one I’d
choose!
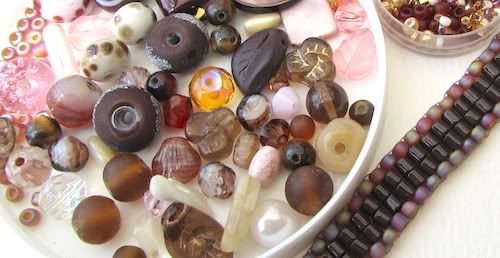
This month’s
project makes use of those little orphan lampies that so many of us have
languishing unloved in our stash boxes, just waiting for someone to pick them
out and give them a good home. And if you don’t have any orphans, search
through the FHFteam’s shops and you’ll find plenty to adopt!
Tutorial: Orphanage Bracelet
You will
need: ‘double delica’ (size 8 cylinder) beads and size 8 seed beads for the
base, plus half a dozen small ‘orphan’ lampwork beads, a few 4mm crystal
bicones, 30-ish ‘accent’ beads anywhere between 6 and 10 mm in diameter, a
teaspoon of ‘bead soup’ with seed beads in sizes 11 and 8, a couple of jump
rings and a clasp.
You will also
need a beading needle, pliers, scissors, and thread – a tough ‘braided’ thread
such as Fireline or PowerPro is recommended for this one because you’re using
crystals and relatively heavy beads for the embellishment. (If any fringe beads
look wobbly, go through them again once or twice more to stiffen their
resolve.)
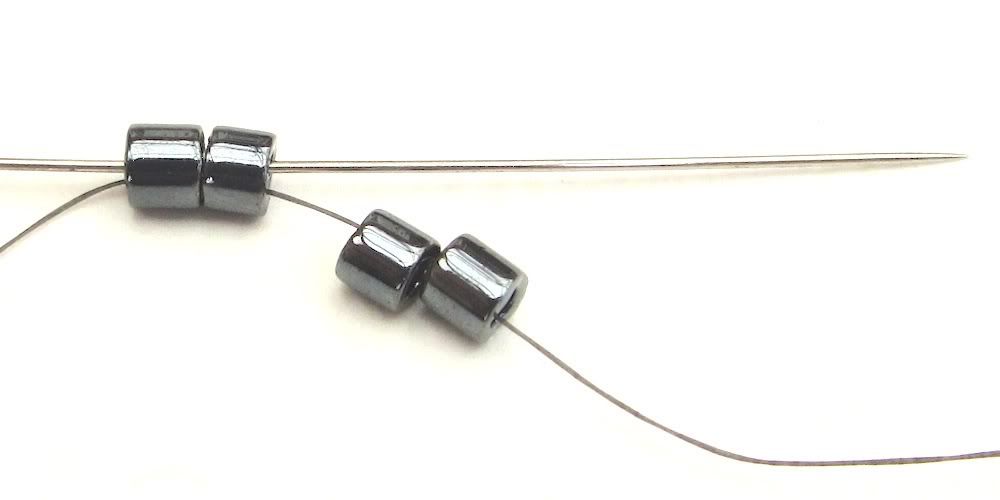
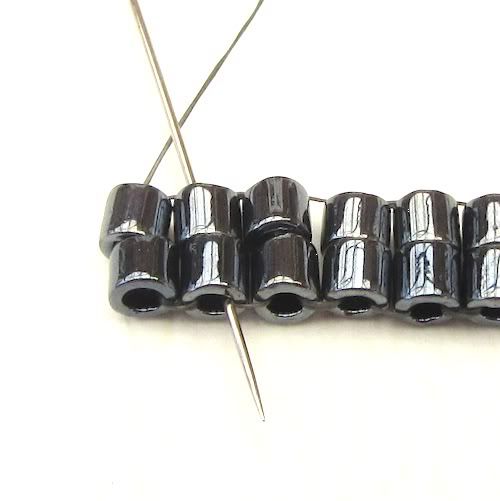
Thread your
needle with no more than two arms’ length of thread and pick up four double
delicas. Go through the first two of them again.
Pull the
thread snug so you have two pairs sitting side by side. These are the first two
‘rungs’ of your ladder.
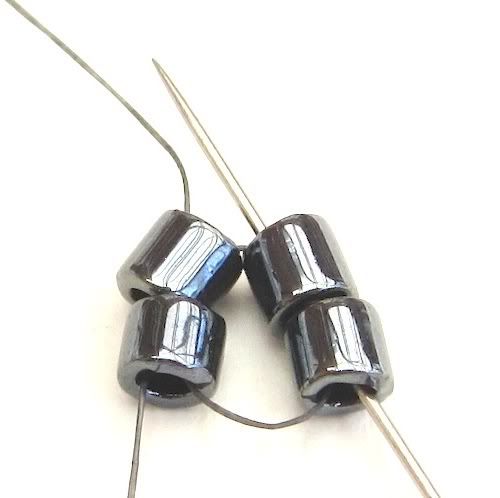
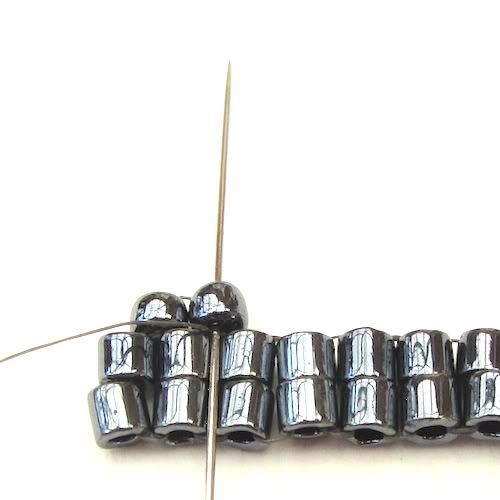
Pick up
another two double delicas and go through the previous ‘rung’ again.
Then go
through the pair you just added.
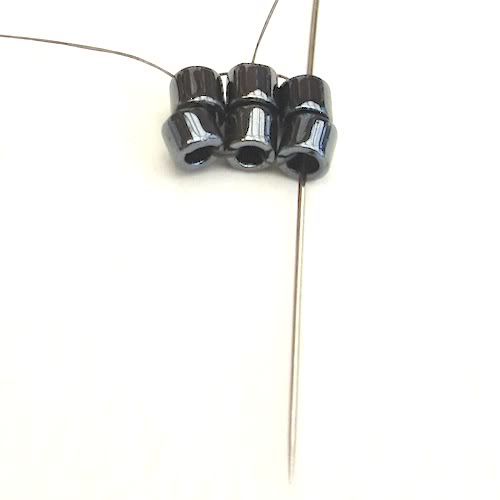
Pick up
another two and do the same again. (Ladder stitch is really, really simple!)
Keep going until the strip will fit your wrist. Then add another four or five
pairs because it shrinks a bit when you add the edging. But don’t worry, it’s
very easy to add more to the ends if you find it’s got a bit short…
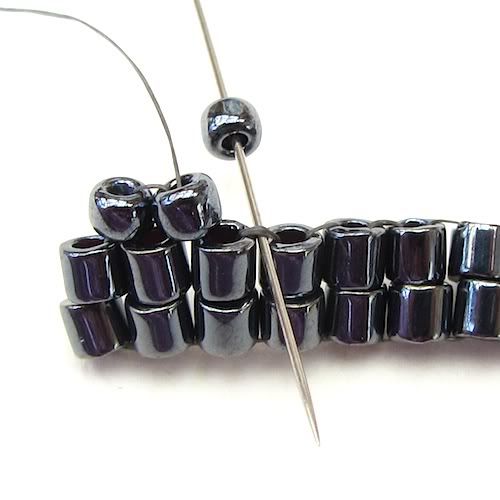
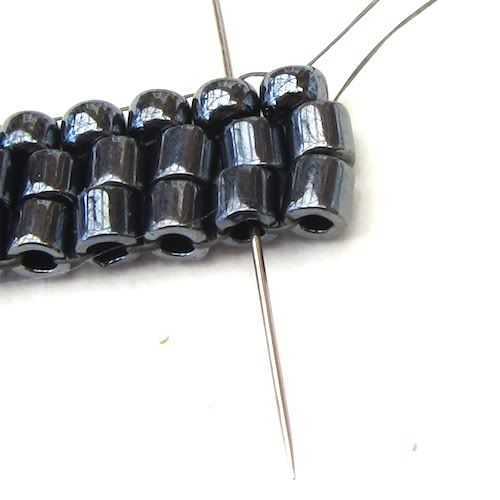
Now for the
brickstitch edging. Go through the last-but-one rung of your ladder so you’re
exiting the second bead from the end of the strip (sorry, this photo is upside
down for some reason).
Pick up two
size 8 seed beads and pass your needle under the thread that connects the
second and third rungs.
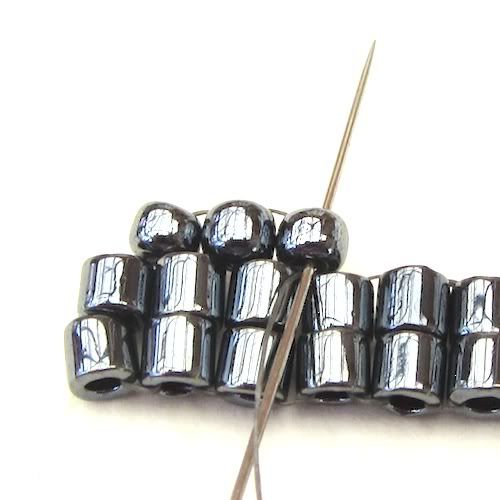
Then go up
through the second of the seed beads you just added.
Pick up one
more seed bead and go under the thread that connects the third and fourth
rungs.
And back up
through the bead you just added.
Carry on
adding one seed bead to each thread bridge all along the strip. At the far end,
double back on yourself so you’re coming out of the second cylinder bead from
the end on the other side.
Flip the
strip over and work back along the other edge.
Now you’re
ready to add the embellishment – the fun part! It’s just simple fringing and
I’m sure you already know how to do that, but here’s a quick run-through again…
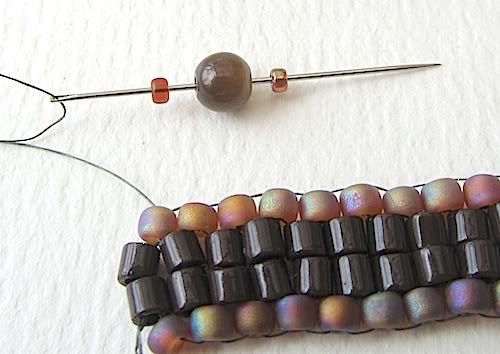
Exit the
first size 8 along the edge. Pick up a size 11 seed, an accent bead, another
size 11.
Go back
through the accent bead and first size 11 and carry on down through the size 8
bead you came out of.
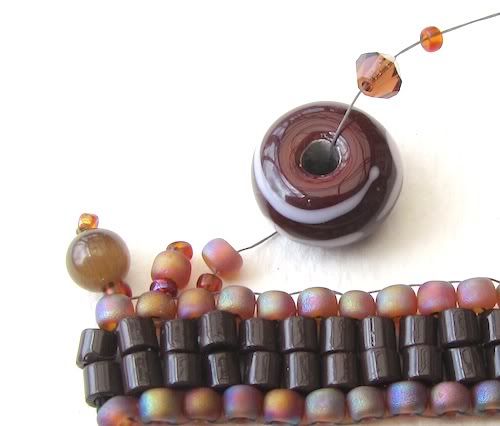
Go up through
the next size 8 and add another fringe with a size 8 bead in place of the
accent. Continue to alternate size 8’s and accents. When you add a lampwork
orphan, start the fringe with a size 11 and then a size 8 seed bead, then
string the orphan, a crystal bicone and a size 11. Go back down through
everything except the last size 11.
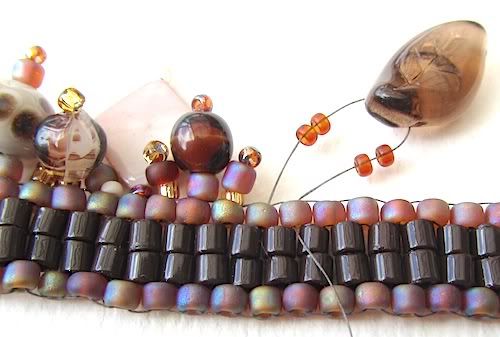
Keep going
all the way along both edges of the base strip, mixing and matching however you
like. If you have an accent bead with a transverse hole, add seed beads before
and after it, and if it’s wide (like this leaf) spread it over two edge beads.
When the
fringe is complete, add a loop of seed beads to the end of the cylinder bead
rows; go through it plenty of times to make it strong, then weave the thread
into the beadwork, knot and trim it.
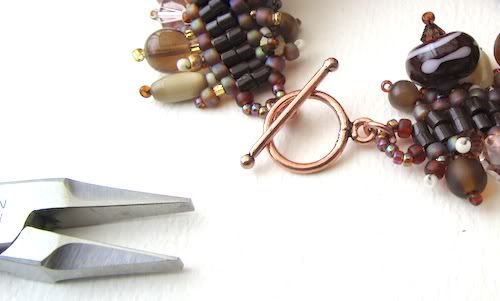
Add a loop to
the other end in the same way, then use pliers and jump rings to connect the
clasp to the loop.
Wear and
Enjoy!
Happy
beading,
Lynn