
You can find beautiful beads, glass and more made by the talented members of FHFteam HERE

Sunday, 5 February 2012

Sunday, 29 January 2012
Lynn's Lampies - February 2012
Lynn’s Lampies February 2012
A regular spot from team member Lynn Davy, a self-confessed bead addict whose unusual designs often feature lampwork beads. In this series she shares some of her secrets and shows you how to use FHFteam’s handmade beads and components in your own creations!
Love is in the Air

It’s that time of year again – Christmas has faded into distant memory, the sun is shining (occasionally), the birds are singing, the odd spring flower is daring to blossom… and we’re coming over all romantic and thinking about Valentine’s Day.
When a young man’s fancy lightly turns to thoughts of… buying handmade jewellery for his beloved, we hope!
No shortage of prettiness in FHFteam shops, as a quick Etsy search for ‘FHFteam flower’ will show you. And I had plenty of suitably romantic items in my bead box when I came to write this post…

Earrings are always popular and it’s very easy to turn an ‘earring pair’ of lovely handmade beads into a unique and covetable gift.
Sometimes the beads speak for themselves and need only the minimum of interference. I had three gorgeous red rosebuds in my bead stash – what could be more romantic? So I teamed them with ‘fire opal’ crystals, to bring out the sharpness of the red and its hint of orange where the light comes through, made simple dangles and put them on handmade hoop earwires.

The third rosebud could have been a simple little pendant on a sterling chain, but the rich, acid colours went so well with a whole range of crystal shades that I gave it the opulent treatment and made it the focal point of a sparkling necklace with plenty of silver.

The crystal colours are slightly randomised: a symmetrical arrangement looked too formal alongside the organic shape of the flower.

I think the finished necklace has a rather Indian feel about it – lively and vibrant
Sometimes you might want to add a bit more detailing or movement to earrings. These little polymer squares have been strung onto eyepins (which have a little loop or eye at the bottom, as distinct from headpins, which have, well, a head) so that I could add a cluster of charms underneath.

The flower and leaf charms are made in just the same way as the earring dangle, but smaller, then linked together with a jump ring that goes through the eye of the eyepin underneath the clay bead. And although none of them is the exact colour of the polymer clay, they are similar tones – so the overall effect looks matching, even though it isn’t. (See, I cheat all the time!)
Make sure you hang the earrings so the charm clusters are mirror images of each other: one leaf on the left, the other on the right. Little touches like this make your work look professional.
And now, seeing as I have a huge pile of pink and green beads still sitting on my desk left over from my latest beading project, I think I’ll turn them into a charm bracelet. Somehow that seems easier than sorting them all out and putting them away again. And charm bracelets are gorgeously romantic and lovely for spring, when those big woolly jumpers go back in the wardrobe and you get to see your wrists again…

Tutorial: Charm Bracelet
You will need:
· A charm bracelet base (or a length of chain and a clasp to make your own)
· Headpins*
· Jump rings or split rings
· A selection of accent beads*, 6-10 mm seems to work best: small lampies, pressed glass shapes, pearls, stones, whatever you like really
· A selection of smaller accent beads, 2-4mm
· A spoonful of seed beads in sizes 8 and 11 - leftover ‘bead soup’ is ideal
· A largish charm or metal bead to go beside the clasp – I used a pewter heart
· 5-6 charms or metal beads
· A few beadcaps or metal spacers and/or 2-3mm metal beads
· Round-nosed, flat-nosed and (if possible) crimping pliers; wire cutters
*The exact numbers of components are up to you. I like to use 4 charms per link of chain and my bracelet base has 17 links, so that’s a total of around 70.
1. To keep the colour balance roughly even along the length of the bracelet, divide the beads into four groups and lay them out in rows. Otherwise you tend to find you’ve picked out some beads preferentially and run out of them by the time you get half-way. I work on one bracelet link at a time to avoid losing my place.

2. This is an important point and often overlooked – if your bracelet has a toggle clasp, you need to make sure the toggle can pull through the loop to fasten it. If you add charms right up to the bottom of the toggle, you’ll find it’s very difficult to put your bracelet on. So leave a blank link (or two if they are small).

3. Most of the charm dangles are made on headpins with wrapped loops – just as for the earrings we made back in my October 2011 blog post. But since the loop is to be wrapped onto the bracelet chain, the finishing is a bit different. Start in the same way, but make the loop fairly large and don’t do the wrapping part yet – just slip the loop over the chain link.


4. Now put the tip of your pliers into the loop to hold it while you do the wrapping. Trim the surplus wire and use crimping pliers (if you have them) to neaten the coil. Check that there are no scratchy ends – file them if necessary. Bracelets need a lot of care as they will be worn next to a sensitive area of skin. Add four dangles to each link before moving on to the next.


5. Charms are much easier to deal with – they already have a loop for hanging. You can use a jump ring or a split ring (more secure) to connect the loop to the bracelet chain. If the charm’s very small and gets lost among the beads, add more rings or use a bigger one.

6. And what about those teardrops or leaves that are ‘top-drilled’, i.e. with the hole across the top, rather than running up and down? You can’t string them on a headpin. And unless the hole is large, jump rings won’t work either, because they’re curved. What you need is a triangle bail. You can buy these, or just make your own from surplus wire. (Cheapskate? Moi?) Make a triangle shape with the ends meeting in the middle of one side. Then just pull the ends apart, put the chain link through the gap, and put one end into each side of your top-drilled bead. Use pliers to squash the sides together until secure.


7. Something else to consider is how to unify your design when you’re using a wide variety of beads. Restricting the colour palette is the most obvious; so is using more than one of each kind of bead, or the same shape but in different colours. You can also be subtle and use the same seed beads – or just slightly different ones – every time you make a dangle with a particular type of bead.
Try using the same colour of seed bead, or a small metal bead, at the bottom and/or top of each dangle. Or use beadcaps or spacers with one particular shape of accent bead.
All of these will help to make your bracelet look carefully considered rather than just thrown together. Even if it was just thrown together.


8. Carry on adding four things to each link until you’ve filled the last one. Then take your heart bead or charm and attach it to the end of the bracelet, right next to the clasp loop. This is a good place to attach a maker’s tag if you have one, or perhaps a photo frame charm with a picture, or a custom tag with the new owner’s name… the possibilities are endless.

And there you are, done!

There are as many styles of charm bracelet as there are beaders. I hope you’ve enjoyed learning about mine. Now grab your bead stash and go and discover yours!
Happy Valentine’s Day!
Lynn

Members’ shops mentioned in this article
Helen Chalmers http://www.etsy.com/shop/helenjewellery
Diane Cook http://www.etsy.com/shop/dilunah for beads and http://www.dilunah.com/index.htm for findings
Helen Gorick http://www.etsy.com/shop/helengbeads
Julia Hay http://www.etsy.com/shop/Pandanimal
Sabine Little http://www.etsy.com/shop/littlecastledesigns
Ilona Ruttle http://www.etsy.com/shop/Fluidglassartbeads
Hazel Ward http://www.etsy.com/shop/ContinuumDesigns
Jolene Wolfe http://www.etsy.com/shop/KitzbitzArtBeads
A regular spot from team member Lynn Davy, a self-confessed bead addict whose unusual designs often feature lampwork beads. In this series she shares some of her secrets and shows you how to use FHFteam’s handmade beads and components in your own creations!
Love is in the Air
It’s that time of year again – Christmas has faded into distant memory, the sun is shining (occasionally), the birds are singing, the odd spring flower is daring to blossom… and we’re coming over all romantic and thinking about Valentine’s Day.
When a young man’s fancy lightly turns to thoughts of… buying handmade jewellery for his beloved, we hope!
No shortage of prettiness in FHFteam shops, as a quick Etsy search for ‘FHFteam flower’ will show you. And I had plenty of suitably romantic items in my bead box when I came to write this post…
Pretty, romantic, flowery beads by FHFteam members Helen Chalmers, Hazel Ward, Julia Hay, Helen Gorick, Ilona Ruttle and Jolene Wolfe
Earrings are always popular and it’s very easy to turn an ‘earring pair’ of lovely handmade beads into a unique and covetable gift.
Sometimes the beads speak for themselves and need only the minimum of interference. I had three gorgeous red rosebuds in my bead stash – what could be more romantic? So I teamed them with ‘fire opal’ crystals, to bring out the sharpness of the red and its hint of orange where the light comes through, made simple dangles and put them on handmade hoop earwires.
Red, red rosebuds by Sabine Little; sterling hoop earwires by Diane Cook
The third rosebud could have been a simple little pendant on a sterling chain, but the rich, acid colours went so well with a whole range of crystal shades that I gave it the opulent treatment and made it the focal point of a sparkling necklace with plenty of silver.
Rosebud by Sabine Little
The crystal colours are slightly randomised: a symmetrical arrangement looked too formal alongside the organic shape of the flower.
I think the finished necklace has a rather Indian feel about it – lively and vibrant
Sometimes you might want to add a bit more detailing or movement to earrings. These little polymer squares have been strung onto eyepins (which have a little loop or eye at the bottom, as distinct from headpins, which have, well, a head) so that I could add a cluster of charms underneath.
Polymer clay beads by Hazel Ward
The flower and leaf charms are made in just the same way as the earring dangle, but smaller, then linked together with a jump ring that goes through the eye of the eyepin underneath the clay bead. And although none of them is the exact colour of the polymer clay, they are similar tones – so the overall effect looks matching, even though it isn’t. (See, I cheat all the time!)
Make sure you hang the earrings so the charm clusters are mirror images of each other: one leaf on the left, the other on the right. Little touches like this make your work look professional.
And now, seeing as I have a huge pile of pink and green beads still sitting on my desk left over from my latest beading project, I think I’ll turn them into a charm bracelet. Somehow that seems easier than sorting them all out and putting them away again. And charm bracelets are gorgeously romantic and lovely for spring, when those big woolly jumpers go back in the wardrobe and you get to see your wrists again…
Tutorial: Charm Bracelet
You will need:
· A charm bracelet base (or a length of chain and a clasp to make your own)
· Headpins*
· Jump rings or split rings
· A selection of accent beads*, 6-10 mm seems to work best: small lampies, pressed glass shapes, pearls, stones, whatever you like really
· A selection of smaller accent beads, 2-4mm
· A spoonful of seed beads in sizes 8 and 11 - leftover ‘bead soup’ is ideal
· A largish charm or metal bead to go beside the clasp – I used a pewter heart
· 5-6 charms or metal beads
· A few beadcaps or metal spacers and/or 2-3mm metal beads
· Round-nosed, flat-nosed and (if possible) crimping pliers; wire cutters
*The exact numbers of components are up to you. I like to use 4 charms per link of chain and my bracelet base has 17 links, so that’s a total of around 70.
1. To keep the colour balance roughly even along the length of the bracelet, divide the beads into four groups and lay them out in rows. Otherwise you tend to find you’ve picked out some beads preferentially and run out of them by the time you get half-way. I work on one bracelet link at a time to avoid losing my place.
Materials and tools for making your bracelet. Note how the beads are laid out in rows
2. This is an important point and often overlooked – if your bracelet has a toggle clasp, you need to make sure the toggle can pull through the loop to fasten it. If you add charms right up to the bottom of the toggle, you’ll find it’s very difficult to put your bracelet on. So leave a blank link (or two if they are small).
Leave room for the toggle to fasten
3. Most of the charm dangles are made on headpins with wrapped loops – just as for the earrings we made back in my October 2011 blog post. But since the loop is to be wrapped onto the bracelet chain, the finishing is a bit different. Start in the same way, but make the loop fairly large and don’t do the wrapping part yet – just slip the loop over the chain link.
Adding a wrapped loop to a chain
4. Now put the tip of your pliers into the loop to hold it while you do the wrapping. Trim the surplus wire and use crimping pliers (if you have them) to neaten the coil. Check that there are no scratchy ends – file them if necessary. Bracelets need a lot of care as they will be worn next to a sensitive area of skin. Add four dangles to each link before moving on to the next.
Wrap the loop and tidy the ends
5. Charms are much easier to deal with – they already have a loop for hanging. You can use a jump ring or a split ring (more secure) to connect the loop to the bracelet chain. If the charm’s very small and gets lost among the beads, add more rings or use a bigger one.
Charms are simple to attach
6. And what about those teardrops or leaves that are ‘top-drilled’, i.e. with the hole across the top, rather than running up and down? You can’t string them on a headpin. And unless the hole is large, jump rings won’t work either, because they’re curved. What you need is a triangle bail. You can buy these, or just make your own from surplus wire. (Cheapskate? Moi?) Make a triangle shape with the ends meeting in the middle of one side. Then just pull the ends apart, put the chain link through the gap, and put one end into each side of your top-drilled bead. Use pliers to squash the sides together until secure.
Making a triangle bail. Bend half a side, then two full sides, then the remaining half, and trim the wire. Then pull gently apart with pliers to link to the chain and attach your bead
7. Something else to consider is how to unify your design when you’re using a wide variety of beads. Restricting the colour palette is the most obvious; so is using more than one of each kind of bead, or the same shape but in different colours. You can also be subtle and use the same seed beads – or just slightly different ones – every time you make a dangle with a particular type of bead.
Try using the same colour of seed bead, or a small metal bead, at the bottom and/or top of each dangle. Or use beadcaps or spacers with one particular shape of accent bead.
All of these will help to make your bracelet look carefully considered rather than just thrown together. Even if it was just thrown together.
Keeping a bit of consistency helps to pull it all together and satisfy the eye
8. Carry on adding four things to each link until you’ve filled the last one. Then take your heart bead or charm and attach it to the end of the bracelet, right next to the clasp loop. This is a good place to attach a maker’s tag if you have one, or perhaps a photo frame charm with a picture, or a custom tag with the new owner’s name… the possibilities are endless.
Add a nice big heart charm to the clasp
And there you are, done!
There are as many styles of charm bracelet as there are beaders. I hope you’ve enjoyed learning about mine. Now grab your bead stash and go and discover yours!
Happy Valentine’s Day!
Lynn
Members’ shops mentioned in this article
Helen Chalmers http://www.etsy.com/shop/helenjewellery
Diane Cook http://www.etsy.com/shop/dilunah for beads and http://www.dilunah.com/index.htm for findings
Helen Gorick http://www.etsy.com/shop/helengbeads
Julia Hay http://www.etsy.com/shop/Pandanimal
Sabine Little http://www.etsy.com/shop/littlecastledesigns
Ilona Ruttle http://www.etsy.com/shop/Fluidglassartbeads
Hazel Ward http://www.etsy.com/shop/ContinuumDesigns
Jolene Wolfe http://www.etsy.com/shop/KitzbitzArtBeads
Wednesday, 25 January 2012
Member Interrogations - Becky Fairclough
A welcome this week to Becky Fairclough of Chameleons Designs, who talks about her inspirations, perfectionism, and lampworked lungs! You'll have to read on to find out more...
1 - Your name: Becky Fairclough
2 - Your shop name and address: I have two Etsy shops, Chameleons Designs where I sell transfers for use in lampwork and Becky Fairclough which has some of my fused glass pieces in it. I also have my website http://www.chameleondesigns.co.uk/
3 - Describe your artistic style in three words: Contemporary, delicate, pretty
4 - When did you first start working with glass and how did you get started?
I have always loved glass but my first proper experience of working with it was during my art foundation course and I went from there to a glass degree course and was completely smitten.
5 - What do you love most about your craft?
Most of all I love working with glass in a molten state, there is something magical about being able to manipulate it and then it freezing in a position.
6 - If you could take a class with any artist (in your field or otherwise) who would you choose and why?
There are a number of Lampworkers I would love to take a class with, well actually more of a very long list, mainly in that ever increasing thirst for new techniques, but if I had to choose just one then it would be Annie Cattrell as she was my first (albeit at the time unknown) introduction to lampwork when she gave a lecture called Art, Science and Transparency when I was doing my foundation course. Im still in awe of her piece "Capacity" (Lampworked lungs - can be seen here - http://www.vam.ac.uk/vastatic/microsites/1637_outoftheordinary/artists_detail.php?artistTag=cattrell) to this day.
7 - Do you have a favourite piece of your work that you can share with us?
At the moment it is my blue flower necklace, which I love and wear most days.

8 - Where do you find your inspiration?
Usually from things I see around me, my work will quite often change when I have been on holiday and seen different things and I come home and play with incorporating them into my work.
9 - What’s your favourite technique within your medium?
Im not sure I can pick only one ! I love to make sculptural work although I am still very much a beginner at it, and then to combine it with surface decoration such as transfers, lustres or sandblast
10 - Where do you create your work?
I work in my studio at home. I have slowly taken over more and more space until the point where we had the garage converted into a studio for me.
11 - Do you have a favourite colour scheme or range when you’re creating pieces?
I love transparent glass and have about 10 colours that I use a lot of the time with only occasional forays into other colours, I think if I had to choose just a couple of favourites it would be sky blue (052) and Reichenbach Antique Crystal as both of them go beautifully with Silver.
12 - Can you give us a quotation/lyric/piece of advice that sums up your approach to life and your craft?
I would love to say something really fun here or light hearted but the mantra that I tend to repeat most often is "If you are going to do something do it properly" and that does sum up my work as I tend to get wholeheartedly involved in what im doing and do it to the best of my ability..it has been know for me to be a touch of a perfectionist about things ..
13 - The most serious question of all: if you could meet any fictional character, from TV film or literature, who would it be and why?
I think it would have to be Claire from Diana Gabaldon's Outlander series, I was given the first book as a teenager and loved it, I have kept up with the series as new books have come out and frequently re read the whole series and get totally absorbed in it. I think Claire is partly responsible for my interest in medical plants and poisons and I think with all her experiences she would be a totally fascinating person to talk to.
14 - Finally, what are your plans or hopes for your work in the future?
Im currently working with fused glass and patterns as the opportunity has come up and Im really enjoying it.
My future plans revolve around concentrating more on sculptural lampwork, and I hope to work on bigger projects. I have several different threads of work in progress at the moment and I'm hoping that I can bring them all together but I need to improve my skills to match my ideas first !
---
Thank you Becky for sharing your enthusiasm and philosophies with our readers!
1 - Your name: Becky Fairclough
2 - Your shop name and address: I have two Etsy shops, Chameleons Designs where I sell transfers for use in lampwork and Becky Fairclough which has some of my fused glass pieces in it. I also have my website http://www.chameleondesigns.co.uk/
3 - Describe your artistic style in three words: Contemporary, delicate, pretty
4 - When did you first start working with glass and how did you get started?
I have always loved glass but my first proper experience of working with it was during my art foundation course and I went from there to a glass degree course and was completely smitten.
5 - What do you love most about your craft?
Most of all I love working with glass in a molten state, there is something magical about being able to manipulate it and then it freezing in a position.
6 - If you could take a class with any artist (in your field or otherwise) who would you choose and why?
There are a number of Lampworkers I would love to take a class with, well actually more of a very long list, mainly in that ever increasing thirst for new techniques, but if I had to choose just one then it would be Annie Cattrell as she was my first (albeit at the time unknown) introduction to lampwork when she gave a lecture called Art, Science and Transparency when I was doing my foundation course. Im still in awe of her piece "Capacity" (Lampworked lungs - can be seen here - http://www.vam.ac.uk/vastatic/microsites/1637_outoftheordinary/artists_detail.php?artistTag=cattrell) to this day.
7 - Do you have a favourite piece of your work that you can share with us?
At the moment it is my blue flower necklace, which I love and wear most days.
8 - Where do you find your inspiration?
Usually from things I see around me, my work will quite often change when I have been on holiday and seen different things and I come home and play with incorporating them into my work.
9 - What’s your favourite technique within your medium?
Im not sure I can pick only one ! I love to make sculptural work although I am still very much a beginner at it, and then to combine it with surface decoration such as transfers, lustres or sandblast
10 - Where do you create your work?
I work in my studio at home. I have slowly taken over more and more space until the point where we had the garage converted into a studio for me.
11 - Do you have a favourite colour scheme or range when you’re creating pieces?
I love transparent glass and have about 10 colours that I use a lot of the time with only occasional forays into other colours, I think if I had to choose just a couple of favourites it would be sky blue (052) and Reichenbach Antique Crystal as both of them go beautifully with Silver.
12 - Can you give us a quotation/lyric/piece of advice that sums up your approach to life and your craft?
I would love to say something really fun here or light hearted but the mantra that I tend to repeat most often is "If you are going to do something do it properly" and that does sum up my work as I tend to get wholeheartedly involved in what im doing and do it to the best of my ability..it has been know for me to be a touch of a perfectionist about things ..
13 - The most serious question of all: if you could meet any fictional character, from TV film or literature, who would it be and why?
I think it would have to be Claire from Diana Gabaldon's Outlander series, I was given the first book as a teenager and loved it, I have kept up with the series as new books have come out and frequently re read the whole series and get totally absorbed in it. I think Claire is partly responsible for my interest in medical plants and poisons and I think with all her experiences she would be a totally fascinating person to talk to.
14 - Finally, what are your plans or hopes for your work in the future?
Im currently working with fused glass and patterns as the opportunity has come up and Im really enjoying it.
My future plans revolve around concentrating more on sculptural lampwork, and I hope to work on bigger projects. I have several different threads of work in progress at the moment and I'm hoping that I can bring them all together but I need to improve my skills to match my ideas first !
---
Thank you Becky for sharing your enthusiasm and philosophies with our readers!
Sunday, 22 January 2012
Pick of the Month in January
| Verdant Lampwork Bead Set Petals Blue Green from Alchemy Lampwork UK |
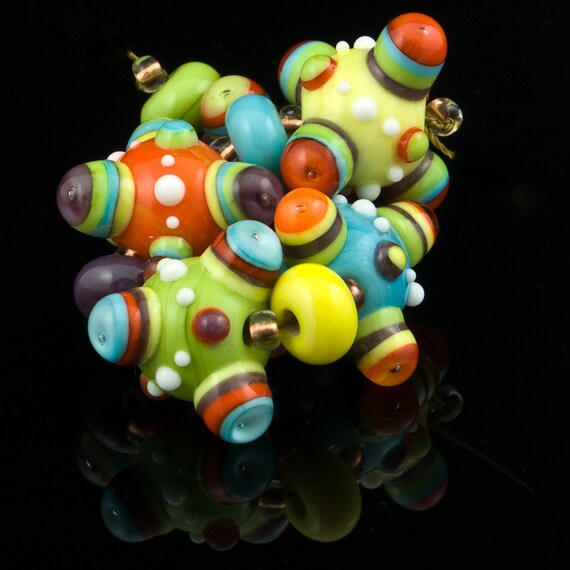 |
| Jumping Jacks, Handmade Lampwork Beads from ARJewellery |
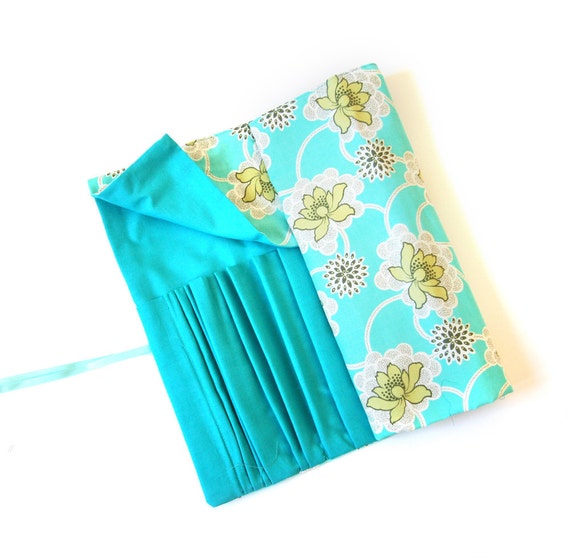 |
| Floral Lampwork Tool Roll from chameleonsdesigns |
 |
| Carnival Lampwork Bead Set from Beadupastorm |
| Visage Lampwork pendant with moon face - Temporis from flyingbead |
Striking and uplifting beads and more from FHFteam
Wednesday, 18 January 2012
FHFTeam Design Process, Karen Lilley
Karen Lilley (Lilley Glass Designs) - Design Process for Black and Green work.
This body of work started life as part of my Glass Techniques course that I finished last June. We could choose any subject, but the idea was that all the work should be obviously linked. I didn’t want to have to choose only one technique (am quite a butterfly) so did look at ideas with the wish to produce fused and slumped work, lampwork and blown work.
I like plants and flowers and so chose to collect a whole heap of pictures of leaves and flowers which I gathered together in my sketch book. Having got them together I considered which I found most striking, which I thought it might be practical to do something with bearing in mind the constraints of glass. These are the ones I liked best for this project (there are others of flowers, seedheads etc etc in my sketch book, some of which I used for other things):


I liked the shapes and the black and green. I liked the stripes.
These bits are from East’s packaging, I like the Chrysanthemum, though I prefer the monotone version they have (top left, rather than the bottom one).

I did some drawing and came up with this:

Largely based on lines from the East Chrysanthemum and the stripes from the collage, and in the three colourways, because although I thought green and black would be what I would go for (that’s why that one is the top one) I thought I should just do a bit of colour investigating to be sure.

I made this plate in black and green, not without its problems, the long thin bits of green were hard to cut without them breaking and it did take a long time to cut for what is quite a small dish and therefore had a limit on what I could charge for it. It also took a fair time to arrange all the bits of green on the base plate of black. Irritatingly one of the greens also had a tendency to devit so I ended up having to cap it with clear and fire it a second time before slumping it. Once I’d slumped it I sandblasted the underside so there was a matt underneath and a shiny top.
I liked it and made coasters to match.

However, if I was to make bowls of this sort then the process had to be quicker, it just was not economical to make the bowl with so many leaves so I simplified it and made:


At the same time I was playing with pattern bar (fusing glass into a solid shape e.g. square, triangular etc which can then be sliced up). Having decided that I liked green and black I made some triangular pattern bar that I sliced up and polished. To decide how I would like to have it arranged for a dish I played with it, moving the bits around each other – so there aren’t any pictures of this. I found I liked a square pattern with chevrons that reminded me of the stripy leaves (though they were green and red). The pattern bar section was not big enough for a plate so I needed to do something to make it plate sized, more stripes of green and black seemed a good plan so I made this square sushi dish

How to make some lampwork that would sit with this green and black work? I decided to continue with the stripes so I made stripy green and black beads starting with a black base and winding trails of different coloured green stringers round the bead. I then raked the trails backwards and forwards (I have a weakness for this sort of raking, it reminds me of colourful book edges and papers, and it also echoed the red and green stripy leaves from the picture). I wanted a lentil shape and so used a press to get a nice shape and consistent sizes. I made a necklace and a bracelet with the beads. I used copper as I thought it went with the green and black better than silver.


The blown work, well, I was (and still am) at the stage of learning how to do it at all, so for that I decided I would make pieces that had a trail which was then raked
I didn’t have any black or red so replaced the black with yellow, this is one of the very early pieces.

I’m still enjoying stripes – this is one of my more recent vases.

Now I’m playing with other ways of getting stripes, using an optic mold and also experimenting with different rims too:

And so the process continues and evolves.
I hope you enjoyed this.
Karen.
PS: Please don’t think I’m always this structured though – sometimes I go to the torch with no idea of what I’m going to make until I start, sometimes I go to the torch or the hot shop to practice a particular skill (that’ll be encased floral beads in the case of lampwork – I love them and want to learn how to put flower murrine in to beads).
To see more of Karen's gorgeous work, you can visit her website: www.lilleyglassdesigns.co.uk
This body of work started life as part of my Glass Techniques course that I finished last June. We could choose any subject, but the idea was that all the work should be obviously linked. I didn’t want to have to choose only one technique (am quite a butterfly) so did look at ideas with the wish to produce fused and slumped work, lampwork and blown work.
I like plants and flowers and so chose to collect a whole heap of pictures of leaves and flowers which I gathered together in my sketch book. Having got them together I considered which I found most striking, which I thought it might be practical to do something with bearing in mind the constraints of glass. These are the ones I liked best for this project (there are others of flowers, seedheads etc etc in my sketch book, some of which I used for other things):


I liked the shapes and the black and green. I liked the stripes.
These bits are from East’s packaging, I like the Chrysanthemum, though I prefer the monotone version they have (top left, rather than the bottom one).

I did some drawing and came up with this:

Largely based on lines from the East Chrysanthemum and the stripes from the collage, and in the three colourways, because although I thought green and black would be what I would go for (that’s why that one is the top one) I thought I should just do a bit of colour investigating to be sure.

I made this plate in black and green, not without its problems, the long thin bits of green were hard to cut without them breaking and it did take a long time to cut for what is quite a small dish and therefore had a limit on what I could charge for it. It also took a fair time to arrange all the bits of green on the base plate of black. Irritatingly one of the greens also had a tendency to devit so I ended up having to cap it with clear and fire it a second time before slumping it. Once I’d slumped it I sandblasted the underside so there was a matt underneath and a shiny top.
I liked it and made coasters to match.

However, if I was to make bowls of this sort then the process had to be quicker, it just was not economical to make the bowl with so many leaves so I simplified it and made:


At the same time I was playing with pattern bar (fusing glass into a solid shape e.g. square, triangular etc which can then be sliced up). Having decided that I liked green and black I made some triangular pattern bar that I sliced up and polished. To decide how I would like to have it arranged for a dish I played with it, moving the bits around each other – so there aren’t any pictures of this. I found I liked a square pattern with chevrons that reminded me of the stripy leaves (though they were green and red). The pattern bar section was not big enough for a plate so I needed to do something to make it plate sized, more stripes of green and black seemed a good plan so I made this square sushi dish

How to make some lampwork that would sit with this green and black work? I decided to continue with the stripes so I made stripy green and black beads starting with a black base and winding trails of different coloured green stringers round the bead. I then raked the trails backwards and forwards (I have a weakness for this sort of raking, it reminds me of colourful book edges and papers, and it also echoed the red and green stripy leaves from the picture). I wanted a lentil shape and so used a press to get a nice shape and consistent sizes. I made a necklace and a bracelet with the beads. I used copper as I thought it went with the green and black better than silver.


The blown work, well, I was (and still am) at the stage of learning how to do it at all, so for that I decided I would make pieces that had a trail which was then raked
I didn’t have any black or red so replaced the black with yellow, this is one of the very early pieces.

I’m still enjoying stripes – this is one of my more recent vases.

Now I’m playing with other ways of getting stripes, using an optic mold and also experimenting with different rims too:

And so the process continues and evolves.
I hope you enjoyed this.
Karen.
PS: Please don’t think I’m always this structured though – sometimes I go to the torch with no idea of what I’m going to make until I start, sometimes I go to the torch or the hot shop to practice a particular skill (that’ll be encased floral beads in the case of lampwork – I love them and want to learn how to put flower murrine in to beads).
To see more of Karen's gorgeous work, you can visit her website: www.lilleyglassdesigns.co.uk
Subscribe to:
Posts (Atom)