
A regular spot from team member Lynn Davy, a self-confessed bead addict whose unusual designs often feature lampwork beads. Over the coming months you can learn some of her secrets and discover how to use handmade beads in your own creations!
How Not To Be Wobbly
So… you’ve bought your first lampwork: some beautiful FHFteam beads. And let’s face it, there were plenty to choose from. Here are some of mine.

These are by FHFteam members Kitzbitz, Karina Thornhill, Puffafish, MyPrecious and Helbels. Visit the team profile at http://www.etsy.com/teams/5954/fhfteam to find links to all our members’ shops!
You could turn them into something like this…

A bit over the top for starters? Well, how about a nice little pair of earrings, then?

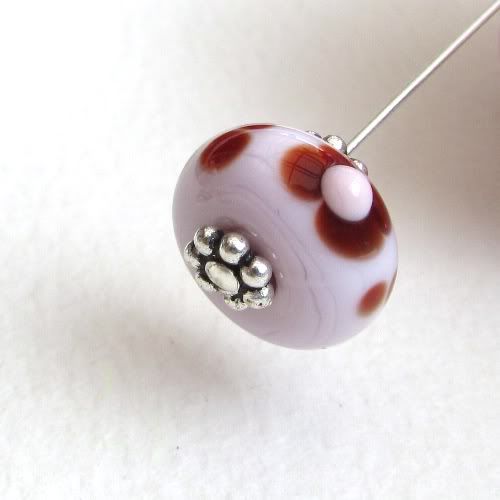
So you get a headpin and thread your lampwork bead onto it. And you notice two things. First, the bead falls off. Well, that’s easily fixed: put a smaller bead onto the pin first. But then you notice that the hole in the lampie is a lot bigger than the wire, so the wire wobbles about.

If you’re going to use lampies on a regular basis (and you are, you just know you are) then you need to know some of the easy ‘fixes’ for this wobbly problem. Basically, you need to reduce the effective size of that hole…
One of the simplest and prettiest ways to do this is to reach for that great beading standby, the 4mm crystal bicone. A well-made lampwork bead will usually have a nice dimple at either end of the hole; the tapered end of the bicone goes into the dimple and holds it steady. Add another bicone on the other side and presto! No more wobbling!

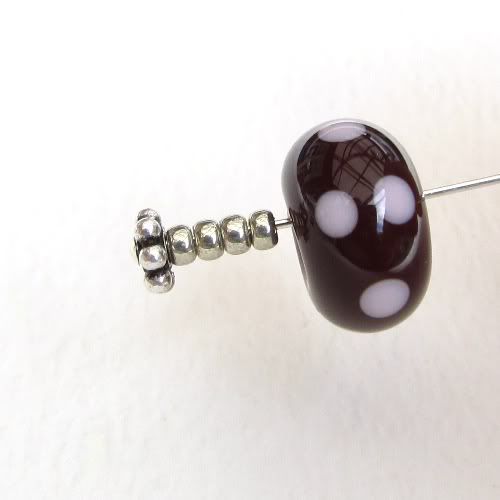
There are other things you can do, too. Put a bead or a spacer with a smaller hole on either side of your lampwork – those little ‘flower’ spacers are great for dangles and there is a whole range of other beads you can try.

Or you can thread a few seed beads and put the lampwork bead over the top of them, so they fill the hole and cure the wobble. (Obviously if it’s on a dangle you still need a spacer or something at the bottom to stop the lampie sliding off!)
You can also use beadcaps – these are domed metal discs that fit on either side of the lampwork bead and hold it securely. I got these lovely copper ones from Diane Cook: http://www.dilunah.co.uk/

Now let’s make those earrings.
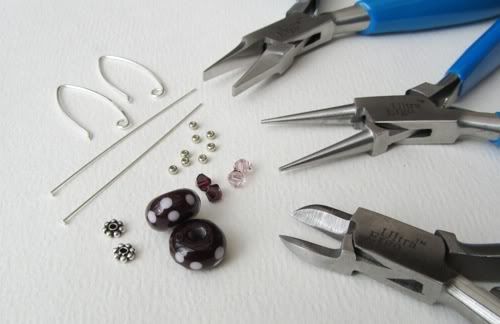
Here’s what you’ll need: two lampwork beads (these are from Puffafish), a pair of earwires (Dilunah), two headpins, two flower spacers or other 4-5mm beads, four crystal 4mm bicones, eight seed beads (these are size 11; more on seed beads in future articles!). And tools: round-nosed pliers, flat-nosed pliers and wire cutters.
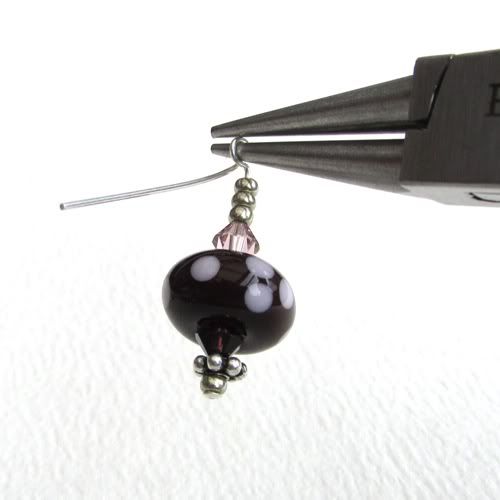
Thread a seed bead, a flower spacer, a bicone, a lampie, another bicone, and three seed beads onto a headpin. Use flat-nosed pliers to bend the wire away from you at a 90 degree angle a couple of millimetres above the beads.

Now switch to your round-nosed pliers to make a ‘wrapped loop’. (This will probably go horribly wrong the first few times you try it, so practise with copper headpins before mangling your best sterling silver ones! But it’s a really useful technique for making a secure, closed loop in wire, so stick at it.)
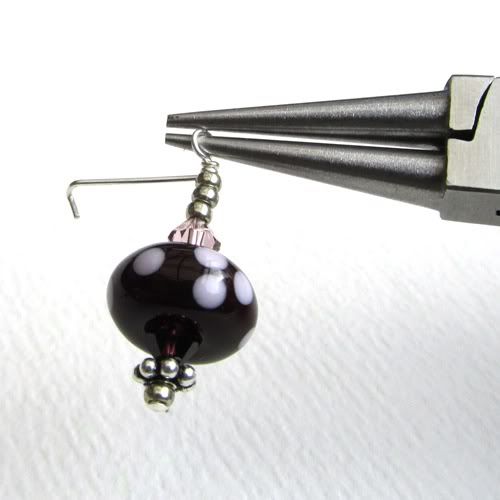
First of all, bend the wire towards you around the top jaw of the pliers – without losing the 90 degree bend you made in the previous step.
Then move this semicircular bend onto the bottom jaw of the pliers, take the free end of wire in your fingers and bend it round, under the bottom jaw of the pliers and back towards you, to complete the loop.
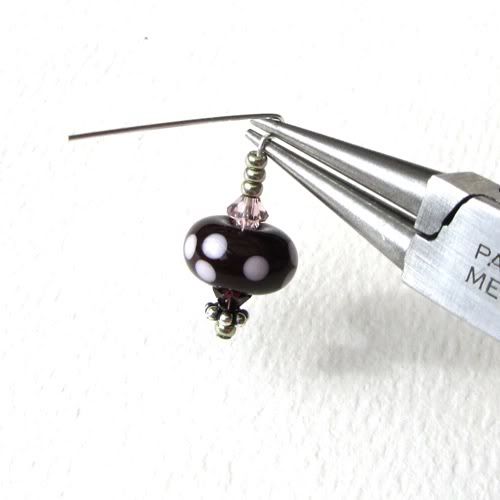
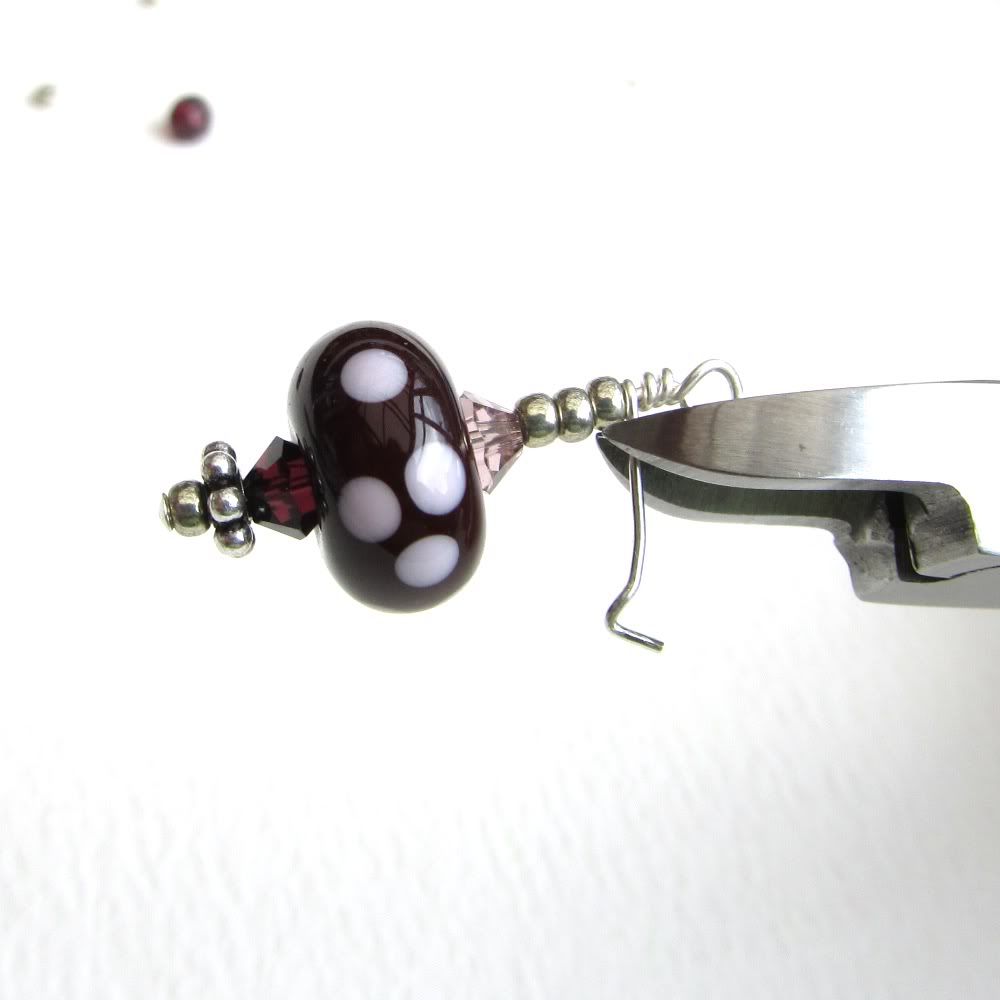
Still holding the loop in the round-nosed pliers, move the round-nosed pliers into your other hand, take your flat-nosed pliers and coil the free end of the wire around the short vertical length between the 90 degree bend and the top of the beads. Twice should do it unless your gap is very large. Try to keep the wraps as neat as possible.
(You can’t see the flat-nosed pliers in this photo because I don’t have three hands, so I had to put the pliers down to hold the camera. But they were gripping that little bent-over bit at the end of the wire.)
Now trim the end of wire as close to the coil as you can.
If a bit still sticks out, use your pliers to neaten it, but be careful not to break the beads. If you have crimping pliers, they are very useful for tidying up wrapped loops. File any ends that are still sharp. I like to do the ‘nose test’: if you can rub the wire coil across that very sensitive bit between your nose and your top lip, and it doesn’t feel scratchy, then you know you’ve done a good job and your wrapped loop is fit to be worn!
Now all you need to do is to open the loop of an earwire and hang your wrapped loop on it. Make sure the neatest part of the coil will be facing forward when the earring is worn.
Repeat the above to make a second earring. (I messed with the design a bit and swapped the crystal colours for the second one. But you can make them matching. They’re your earrings.)
Now wear them and be proud!
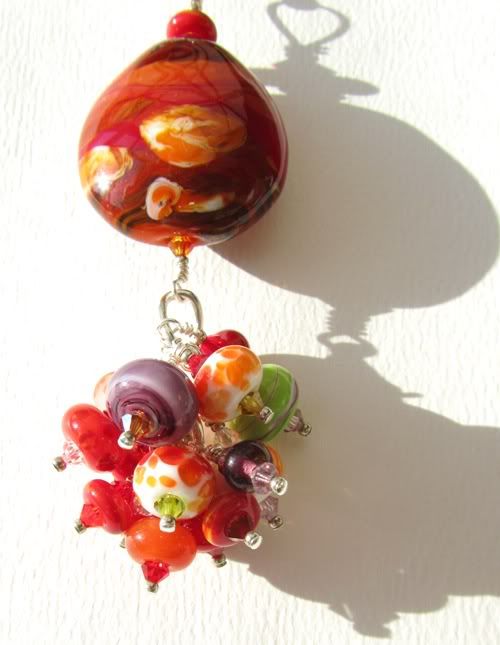
And by the way, you now have all the skills you need to make a big over-the-top necklace.

You do, look:

All this is, is some short lengths of chain connected by wired lampwork dangles – mostly with the wrapped loop technique you’ve just learned, except with a loop at either end of the wire (make one wrapped loop on a straight piece of wire, add beads, wrap the other end). And all the little dangly parts and those humungous tassels are just like the earrings you made.
Happy beading!
----
Don't forget to check back next month for more of Lynn's fabulous tips!
6 comments:
What a great post Lynn, lovely to see a pic of some of my beads, was a fab surprise :-D
This is great Lynn. I'm looking forward to reading the next tips.
What a great tutorial! I just purchased my first set up lampwork beads and this is going to really save me some frustration.
Great blog Lynn this is one of the very first tips I learnt from you and I have made many wobbly earrings etc in my time but with your help I am making a lot more wearable pairs now and also putting this into practice in a lot more of my work. Thank You. B X
lovely easy to understand tips.
thank you Bxx
Lovely post Lynn...;o)
Post a Comment