Lynn’s Lampies
A regular spot from team member Lynn Davy, a self-confessed bead addict whose unusual designs often feature lampwork beads. In this series she shares some of her secrets and shows you how to use FHFteam’s handmade beads and components in your own creations!
May 2012
Cheapskate Cheating
How to make the maximum impact with a minimum of materials is a subject very close to my heart – as you will know if you’ve been following this series of articles.
So here are a few tips on how to be a beady cheapskate. Not that I don’t spend serious money on top-of-the-range materials like handmade glass focals or those perfect, laser-cut Japanese cylinder beads. I do. But there are ways of saving pennies so as to be able to afford the fabulousness when you really need it.
Such as…
Bead stitches with big holes in (like netting, or the right angle weave chain in this month’s tutorial), save time. And time is money, right? You can always make your bracelet or necklace base ‘grow’ faster by using a larger size of seed bead, too.
This bracelet wins on several fronts: it’s made with big beads and a ‘holey’ weave and uses a beautiful vintage button as the clasp.
In addition, a ‘holey’ construction can cover a larger area with fewer beads, and has the added advantage of saving weight. (Less engineering, less risk of breakage, greater comfort for the wearer. Everyone wins!)
Try out affordable alternatives to expensive components, giving you more money for lampies – copper, for example, instead of sterling silver, or a leather charm bracelet for your charm bead collection.
And of course you can make seed beads into spacer beads instead of using lampwork or metal spacers; check out the tutorial I posted
here in January.
Most important rule of cheapskatery: never throw anything away! This bracelet is made from beady leftovers and a selection of vintage buttons from granny’s button box. It was a commission and the customer loved it even though the materials were all recycled.
Failed projects, samples, experiments, broken jewellery… all go into the recycling tub (itself recycled, please note!) to be broken up and re-used.
After a while you’ll find you can pull out leftovers on a particular colour theme. It takes a bit of time to deconstruct them (beadwork is tougher than it looks!) but it’s good to give your unloved beads a new lease of life.
Mix up your leftover beads into ‘bead soup’. (If you don’t generate that many leftovers, some bead shops sell ‘sweepings’ or mixed ‘project beads’ at a discount price.) This little bracelet is entirely made from leftovers. It has a peyote-stitched base in size 8 beads (a larger size, so it grows faster) and is randomly covered with mixed accent beads and shell chips.
Freeform or right angle weave are good beadweaving stitches for dealing with a mixture of beads… this amulet bag is made in right angle weave and has an intriguing ‘tweedy’ sort of texture.
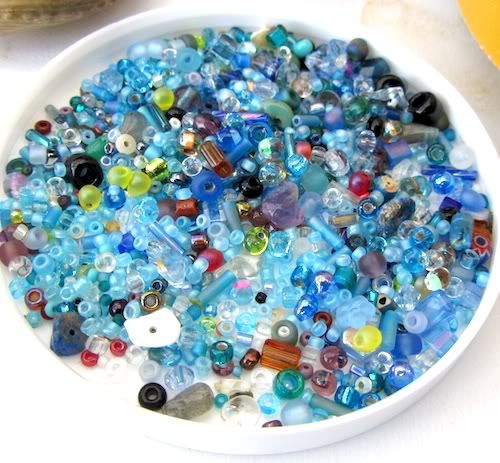
Here’s a sample of my ‘bead soup’ (note the Nutella lid, these make ideal little beading trays!) and below is a short tutorial on how to make a simple right angle weave chain and decorate it with all those little leftover accent beads from your recycling tub.
Cheap seed beads can be a false economy. Indian or Chinese ones are never going to be as evenly sized and shaped as the more expensive Czech or Japanese seeds. So they’re no good for precise geometric work or bead looming. However, they are superb if what you want is texture. And usually, I do. These are about the worst quality seed beads I have ever possessed, but they are such a pretty colour… I’ve used them liberally in the tutorial below. Just make sure the holes aren’t too tight.
There are other ways to save money on beads and components. Charity shops, jumble sales, end-of-season sales at fashion shops, all can yield inexpensive but fabulous materials for the cost-conscious beader. Many beading magazines and websites have giveaways each month. Enter the odd competition; many of them have cool beady prizes and it boosts your reputation and sales too.
Join a forum (there are many, many advantages to this and they go WAY beyond just the beads!) and make friends, take part in swaps and keep an eye out for ‘destash’ posts – also watch out for orphan beads, seconds, discount codes and sales happening in the team’s Etsy shops!
Tutorial: Bead Soup Bracelet
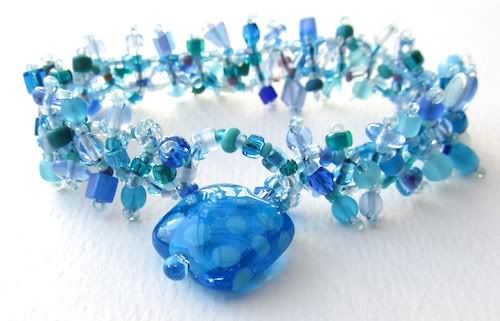
You will need: a couple of teaspoons of ‘bead soup’ with seed beads in mostly smaller sizes (11 and 8 are ideal but this is a forgiving stitch and you can get away with more or less anything!), needle, thread, scissors, about 100 slightly larger ‘accent’ beads about 4-6mm in diameter, one lampwork bead for the clasp. (Mine is a beautiful ‘orphan’ bead from Kathryn Greer.)
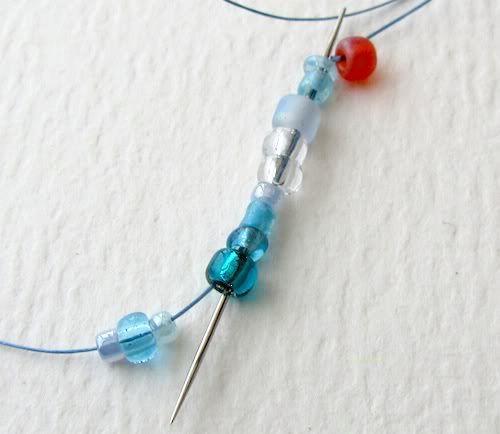
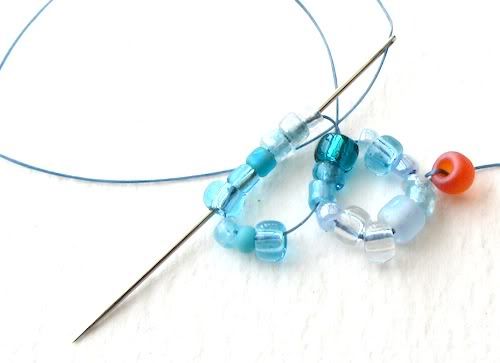
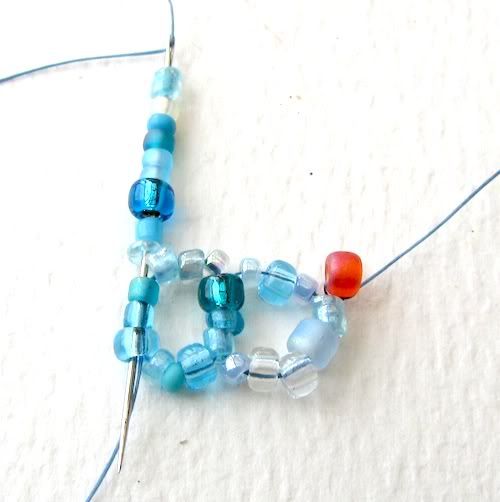
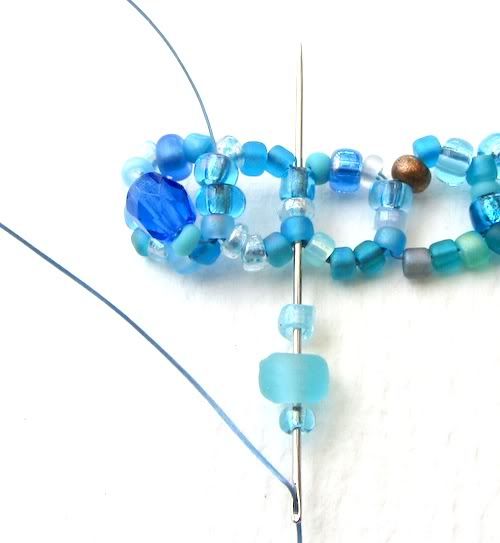
1. Thread your needle with a comfortable length of thread and tie on a ‘stop’ bead by going through it a couple of times (you will remove this bead at the end). The ‘stop’ bead in my photos is orange. Pick up 12 seed beads and go through the first 9 of them again. This makes the first ‘unit’ of your right angle weave chain, with 3 beads along each side.
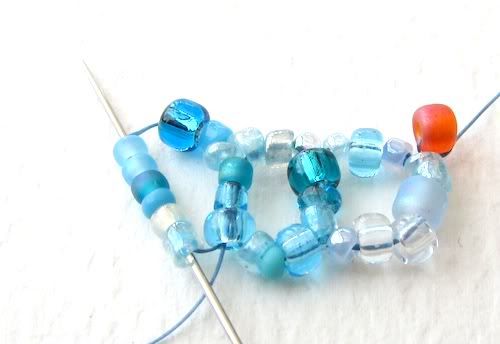
2. Pick up 9 more seed beads and go through the last 3 of your previous unit.
3. Without adding any more beads, go through the first 6 beads of the current unit again.
4. Now pick up 9 more seed beads and continue as before. Notice that the thread makes an alternating ‘figure of 8’ path; you never turn back on yourself, you always follow the thread in the same direction.
5. Go through the first 6 beads of the current unit again. (It helps not to think about it too much.)
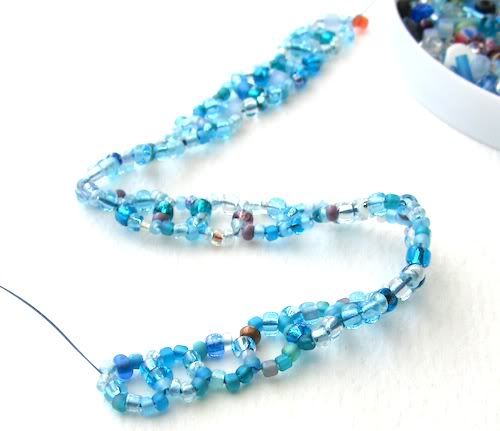
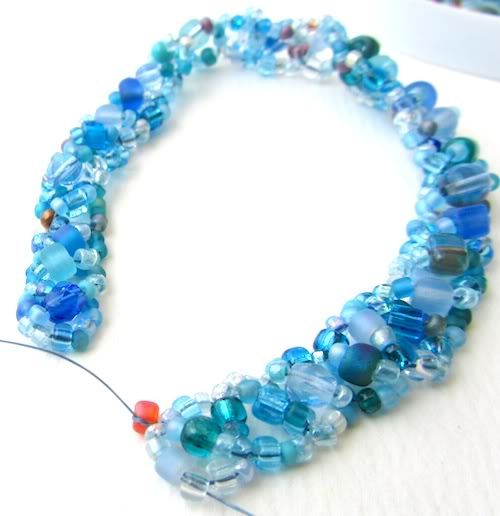
6. Carry on like this until you have a chain of about 30 units – or a generous fit around your wrist (it will shorten a little bit when you add the embellishments).
7. Now start to embellish the chain. Pick up a small seed bead, an accent bead, and another seed bead. Stitch through the next vertical file of beads in your chain.
8. Pick up another three beads (seed, accent, seed) and stitch through the next vertical file of beads in the chain, in the same direction.
9. Continue adding diagonal embellishments all the way back to the start of the chain.
You might choose to leave your bracelet like this, or make it wider by adding fringing up either side.
10. To add fringe, pick up three beads (seed, accent, seed), miss out the last seed and stitch back through the other two beads. Continue on through the vertical file of beads in the base chain and come out on the opposite edge.
11. Add another fringe and stitch through the same vertical file of beads. Weave through two sides of the next unit and repeat to add fringe all along both sides of the bracelet.
Design tip: if you use the same type of seed bead at the tip of your fringe each time, it helps to pull the mixture of beads together and give the piece some coherence.
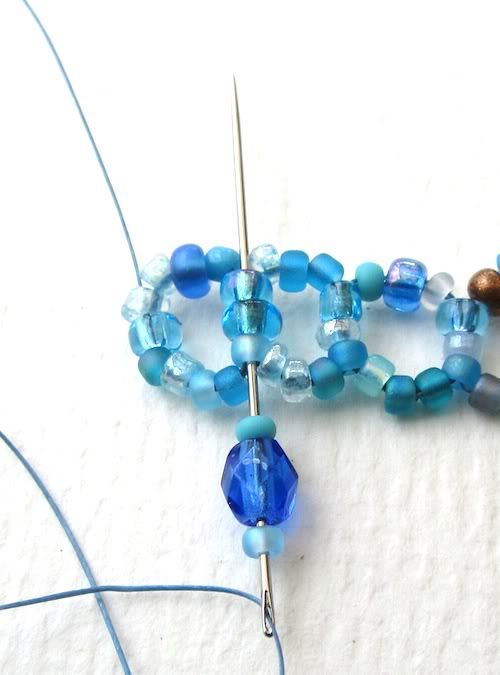
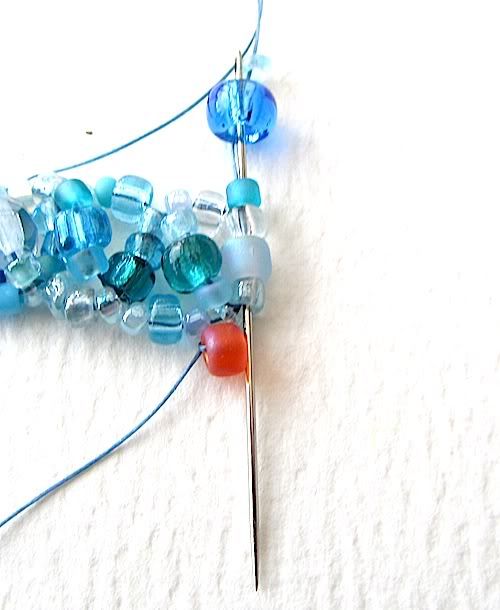
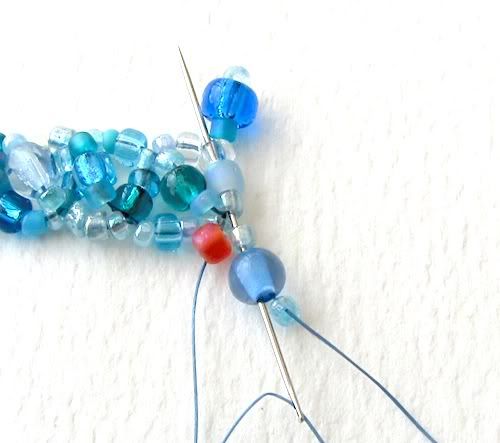
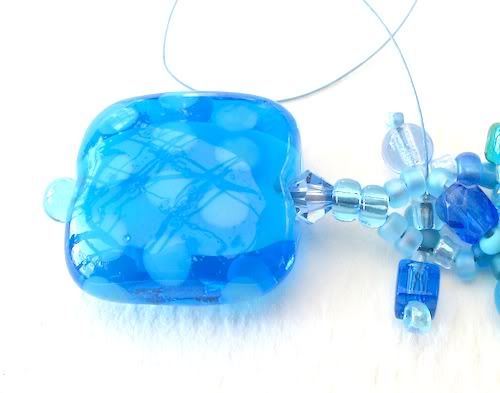
12. To finish, add a lampwork bead to one end and a loop to the other. The lampie first: pick up two small seed beads, two larger ones, a crystal (or some sort of accent bead that’ll fit into the hole of the lampie to stop it wobbling), the lampwork bead, and a small teardrop or ‘fringe drop’ bead (if you don’t have one, just use an accent bead and a seed bead, as for the fringes).
Miss out the teardrop and go back through the lampie, the crystal and the two larger seed beads.
13. Pick up two smaller seed beads and stitch into the opposite end of the last row of beads in your base chain.
14. Pull everything tight and stitch round through the whole clasp assembly again a couple of times to reinforce it. Weave the thread into the beadwork, tie a couple of knots around one of the existing threads, weave through a few more beads and trim the end.
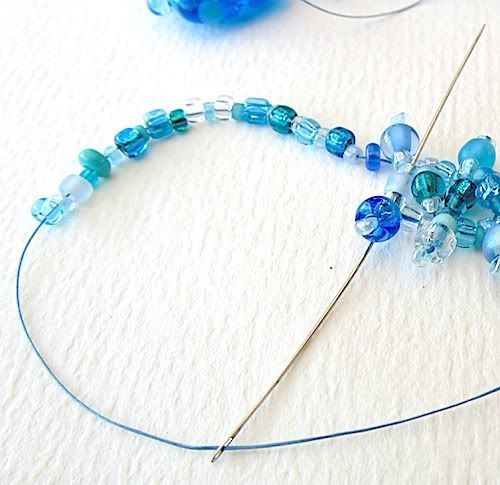
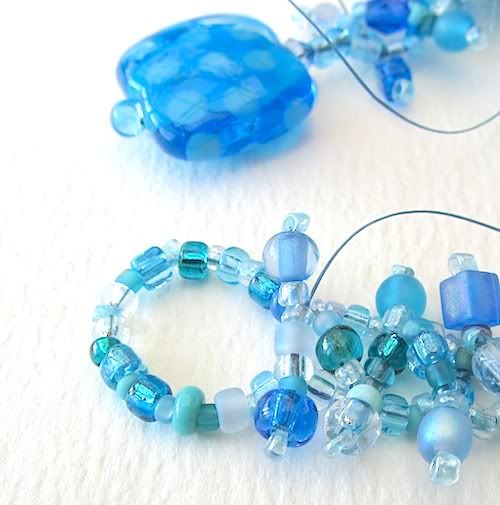
15. Take the stop bead off the other end of the thread and put your needle on it. Pick up 15-20 seed beads, or enough to loop round the lampwork bead.
16. Stitch into the opposite end of the first row of beads of your chain, to make a loop. Check that it fits over the lampie and adjust the number of beads if necessary. Weave the thread through the loop several times to reinforce, then tie and trim the end.
And there you have it! Have fun with your leftovers, and do leave a comment to let us know how you got on.
Happy beading,
Lynn