
A regular spot from team member Lynn Davy, a self-confessed bead addict whose unusual designs often feature lampwork beads. In this series she shares some of her secrets and shows you how to use FHFteam’s handmade beads and components in your own creations!
All I Want For Christmas Is…
Yes, it’s that time of year again. And now that your family and friends all know that you make jewellery, they will be hoping – maybe even expecting – a unique and beautiful handmade gift from you this year.
You don’t want to disappoint them. But you’re so busy. How can you possibly make enough gifts in time?
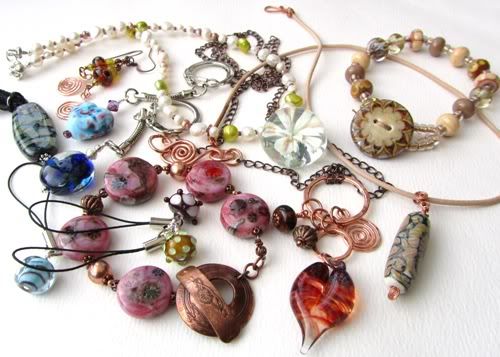 |
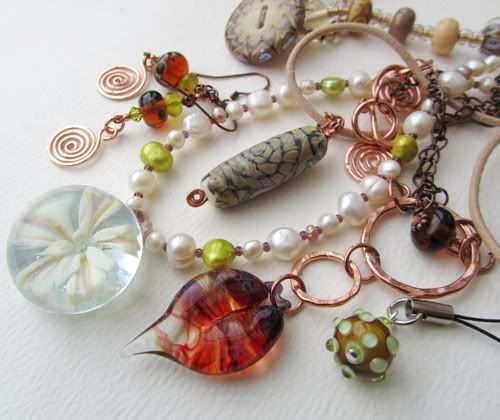
| I had a fabulous evening playing with my FHFteam goodies! |
Never fear – FHFteam is here. With all sorts of wonderful items that are perfect for turning into ‘instant’ gifts. All of the above can be put together in one happy evening, with very basic tools and techniques. And of course the team has plenty of ready-made presents even if you completely run out of beading time!
So where do we start? How about something very simple – what if you just want a tiny token present, or a stocking filler, or something for someone who doesn’t wear jewellery? And you’ve only got five minutes to make it?
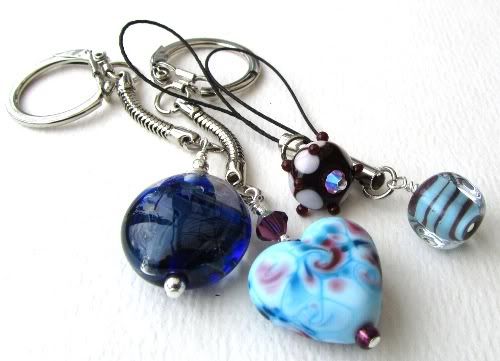 |
| Round focal by Heather Webb; heart by SowZeRe; phone charm beads by Kathryn Greer and Rachel Bishop |
Keyrings are my default answer to this. You learned a simple wire wrapping technique in my October blog post when we made earrings. A keyring is just the same as an earring, only a bit bigger and you only need to make one. One lovely chunky lampie, a headpin, couple of small beads, wrapped loop, keyring chain, pliers… sorted. It will take you longer to find the wrapping paper!
Mobile phone charms are also speedy to make, and can be attached to lots of things other than phones: pencil cases, for example, or zip pulls. If you have more time, you can add more dangles, perhaps spaced out on a short length of chain. This is an easy way to make bag charms, too.
Now, how about that rather delicious bead set you’ve been saving to give to someone special? But you haven’t done anything with it yet because designing just the right piece of jewellery is going to take you ages…
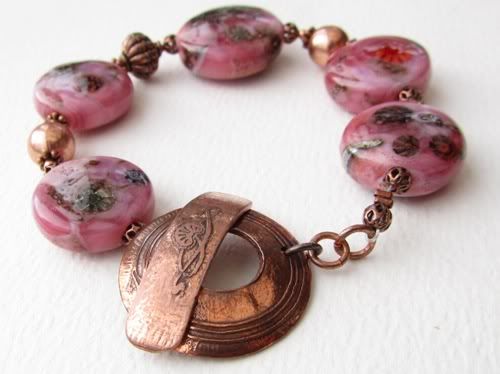 |
| Lampwork bead set by Jolene Wolfe; copper clasp by Di Sandland |
Actually, it’s going to take you half an hour. This bracelet is very simply strung onto beading wire and crimped together. The beads are a nice flattened shape and have so much detail in them, all they needed was a bit of copper in between. The design is slightly random and asymmetric, but since all the spacer beads are the same metal, it doesn’t matter.
Remember that big chunky beads like this will need smaller beads between them – not just to stop them wobbling about on the wire, but to give movement and flexibility. I’ve used 4mm copper filigrees, which sit nicely in the holes of the lampwork beads, and a mixture of ‘flower’ spacers and 2mm round beads to allow the bracelet to curve.
The finishing touch is a gorgeous etched copper toggle. Handmade findings are the perfect complement to handmade beads, and not only is copper a lovely warm colour, it’s considerably cheaper than sterling silver.
Always take care when fitting toggles – you need to be sure that there is enough room to pull the toggle through the loop, so put several small beads between the toggle and your first lampwork bead. Also make sure that there is a ‘break point’ somewhere in the piece – here, it’s the open jump ring that connects the clasp ring to the rest of the bracelet – so that if the jewellery gets caught in something, the breakpoint will give way before the wearer gets damaged!
Or if you don’t want a metal toggle – or the recipient has allergies – how about a button?
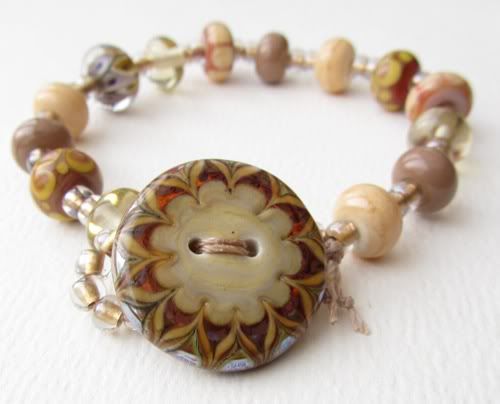 |
| Button by Helen Gorick; beads by various artists including Kathryn Greer and Julia Hay. (There’s no rule that says you can’t mix your beadmakers!) |
This metal-free bracelet is strung on C-Lon nylon cord (handy stuff that comes in all sorts of delicious colours; this is ‘ginger’). I strung a loop of size 6 seed beads big enough to fit over the button, then pushed these to the middle of my thread and knotted it.
A rummage in my stash box produced a handful of beads in toning colours. I strung alternating lampwork and seed beads onto the doubled thread, finishing with the button and knotting the cord ends securely underneath it. You can add a dab of glue to the knots for extra security.
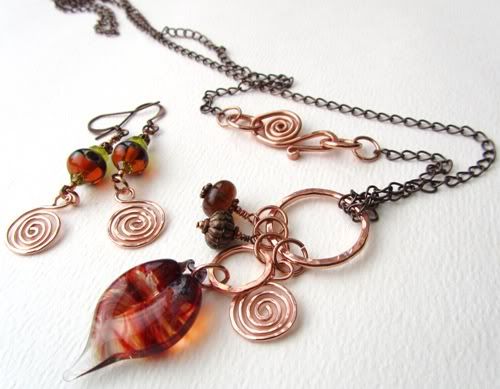 |
| Copper rings, spirals and clasp by Diane Cook; pendant by Glenn Godden; earring beads by Julia Hay |
Back to the copper now. I wanted a long necklace with a striking centrepiece, so I started with some hammered copper rings and spirals. I made a couple of little dangles with wrapped loops, found a glass heart that was just asking for a copper setting, and played around connecting them all together with jump rings until I was happy with the result.
I took a long length of brass chain and attached it to the top ring with a lark’s head knot (see the ribbon tutorial below). The spiral clasp was just too lovely to go at the back, so I attached it at one side of the necklace, near the front, where it can be both a functional clasp and an integral part of the design. (Again, it’s attached with open jump rings to provide a safety breakpoint.)
The copper spirals are also fabulous for earrings. Make wrapped loop dangles but use eyepinseyepin. Make sure they hang opposite ways round when the earrings are worn.
Focal beads, now. A search on Etsy for ‘fhfteam focal’ will bring up lots to choose from. And when you’ve done the shopping and your lovelies arrive, you sit and stroke them and wonder how you can make them look their best without spending hours and hours beading.
Well, sometimes less is more. How about a nice simple pendant… or three?
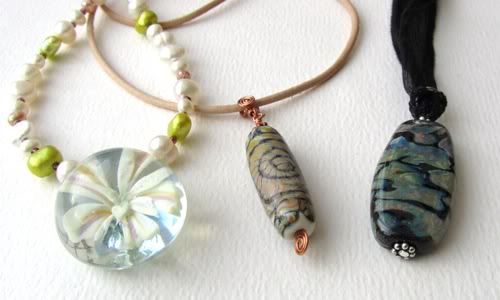 |
| Pendants make great gifts and are quick to assemble |
The flower pendant already has a built-in hanging loop, so all I needed to do here was to string it onto some beading wire and add alternating pearls and seed beads on either side.
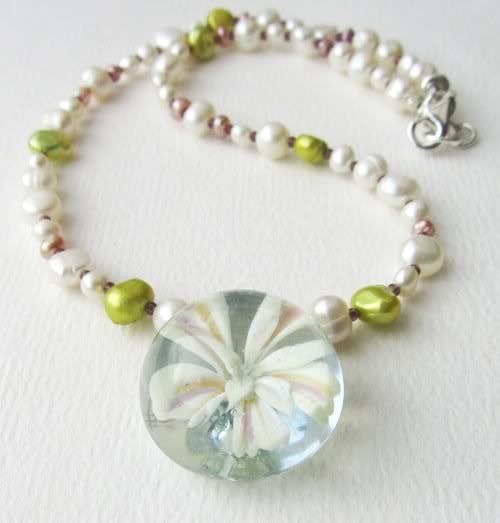 |
| Flower pendant by Glenn Godden. |
I ran into a very common problem with this one. I love it so much I’ve decided to keep it… so now I need to find another present instead!
It’s finished off with crimps and a simple silver clasp. (Stringing and crimping were explained in last month’s blog post, by the way.)
Pendants also look good on chains, ribbons, or suede cord.
What if you have a focal bead without a loop, and want to turn it into a pendant? Well, you already know how to do that. Refer to my October earring tutorial again – a focal bead needs a longer wire or headpin, but the technique is exactly the same.
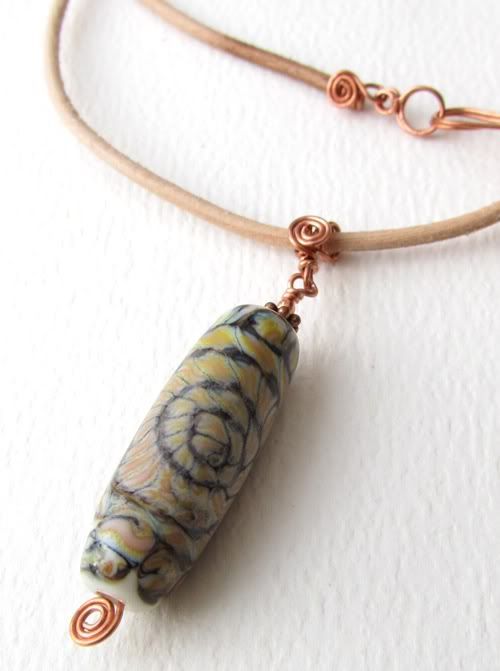 |
| Leather necklace by Scarlet Leonard; focal bead by Jane Hamill |
This pretty little necklace kit comes complete with handmade copper wire clasp and a hanging bail. It also comes with a neat coiled headpin: just add your focal bead and make a wrapped loop at the top. Don’t forget to attach the pendant to the bail BEFORE you do the final wrapping part! (Although if you do… just use a jump ring to connect them… nobody will notice.)
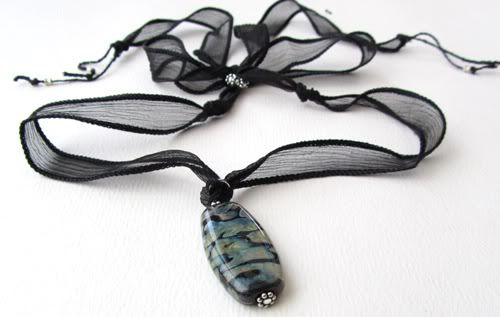 |
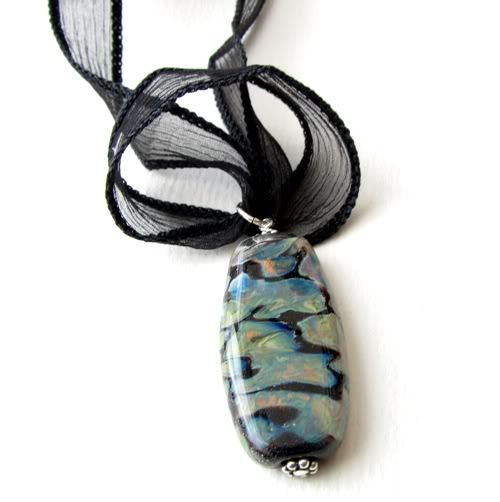
| Focal bead by Jane Hamill; handpainted silk ribbon by SowZeRe |
Ribbons are another lovely way to show off a very special focal bead. This month’s tutorial (below) will take you through making this pendant with its adjustable sliding clasp.
Tutorial: Ribbon pendant with sliding clasp
This is a handy technique for making an adjustable necklace with a length of ribbon or cord. It can be put together with no tools and is a really useful thing to know when you have to make a last-minute necklace for somebody and you’ve run out of clasps!
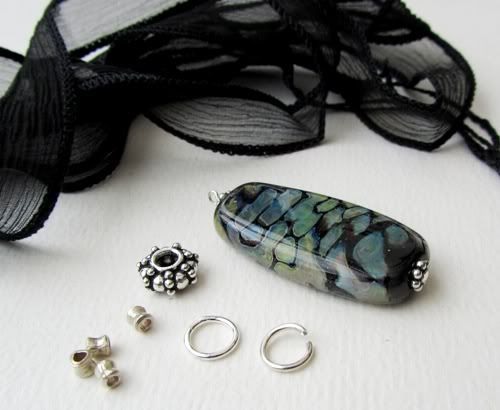
1. You will need:
· A pendant with a hanging loop or bail; or a lampwork focal bead made into a pendant with a wrapped loop (see October’s earring tutorial)
· One open jump ring
· One closed jump ring, at least 8mm diameter; or a hand-hammered silver or copper ring
· A length of silk ribbon (or organza, or alternatively cord or suede or leather…) long enough to go over your head with at least 30cm to spare
· One bead or ring to act as the clasp, with a hole big enough for the ribbon to go through twice
· A couple of small beads to finish off the ribbon ends (the handmade ribbon I used has two ‘tails’ of stitching at either end, so I needed four beads)
· Tools: flat-nosed pliers (two pairs if you have them), sharp scissors
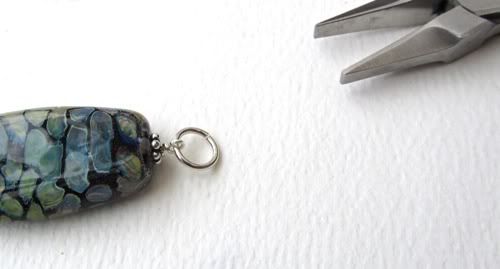
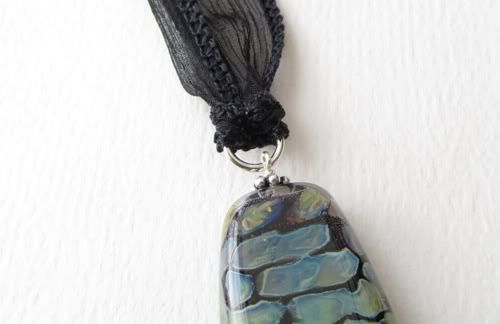
2. Use the pliers and the open jump ring to attach the closed jump ring to the top of the pendant.

3. Fold the ribbon in half and feed the looped end through the closed ring.
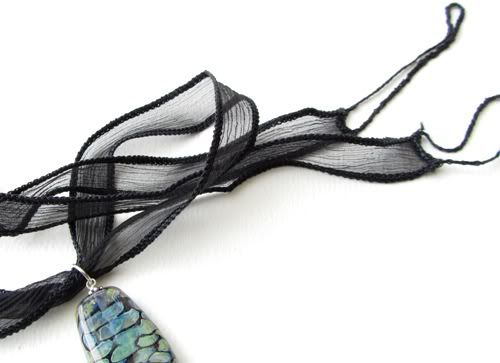
4. Put the ends of the ribbon through the loop.
5. Pull the ends gently to make a neat ‘lark’s head’ knot around the ring.
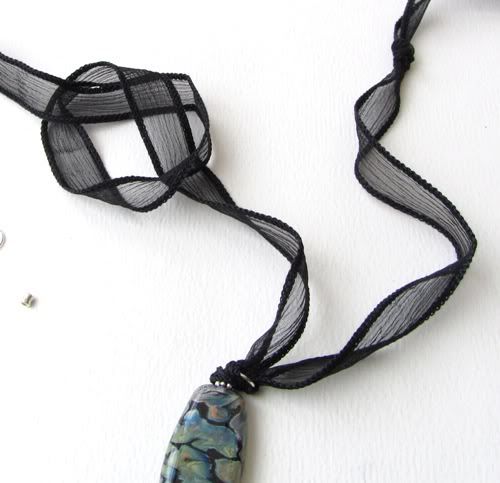
6. To prevent the necklace tightening too far, tie an overhand knot in the ribbon at either side. This will determine the shortest length at which the necklace can be worn. Make sure it’s big enough not to choke the wearer! If the hole in your clasp bead is very large, you may need to add a smaller bead above the knot to make sure it can’t be pulled through.

7. Thread one end of the ribbon through your clasp bead. Thread the other end through in the opposite direction, so that when you pull on the ends, the necklace shortens.
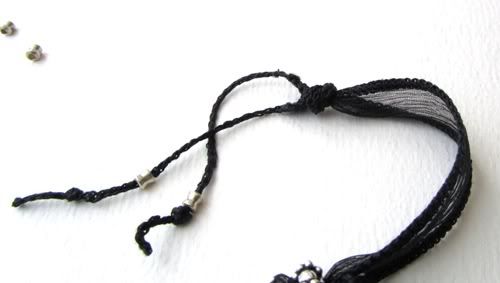
Add beads and/or knots to the ends of your ribbon so they can’t pull out of the clasp bead again. Trim the ends neatly.
Wishing you a happy and creative Christmas from all the FHFteam!
Members’ shops mentioned in this article:
Rachel Bishop http://www.etsy.com/shop/Puffafish
Diane Cook http://www.etsy.com/shop/dilunah for beads and http://www.dilunah.com/index.htm for findings
Glenn Godden http://www.etsy.com/shop/steampunkglass
Helen Gorick http://www.etsy.com/shop/helengbeads
Kathryn Greer http://www.etsy.com/shop/MyPrecious
Jane Hamill http://www.etsy.com/shop/janehamill
Julia Hay http://www.etsy.com/shop/Pandanimal
Scarlet Leonard http://www.etsy.com/shop/ScarletImpressions
Dianne Sandland http://www.etsy.com/shop/disandland
SowZeRe http://www.etsy.com/shop/SowZerE - unfortunately Diane is on vacation until the New Year, but sign up to be notified when she re-opens!
Heather Webb http://www.etsy.com/shop/BumpyBeads
Jolene Wolfe http://www.etsy.com/shop/KitzbitzArtBeads
4 comments:
Fab read Lynn and lot;s and lots of top tips too
I'm loving your series of posts, Lynn! Definitely handy :)
Lynn - you always anage to come up with something special
I love this Lynn.
Off to rustle up some more jewellery for a craft fair next weekend now I have some more inspiration.
Post a Comment